Creating a Character Template or Characterizing in Motion Builder Tutorial |
||||||
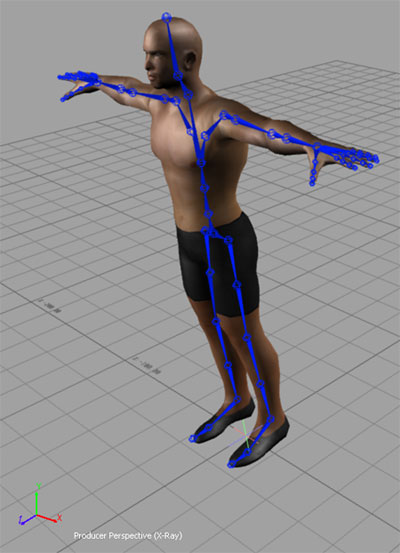
Page 2 After you have named every bone the way that Motion Builder expects, Make sure your skeleton is facing the positive Z axis and its on a full TPose (fig6).
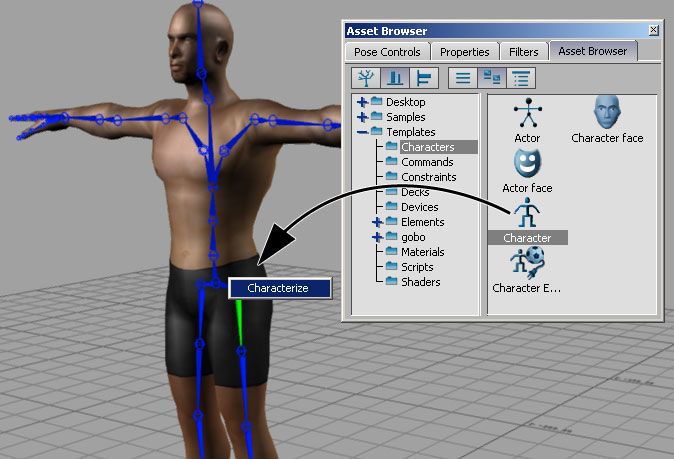
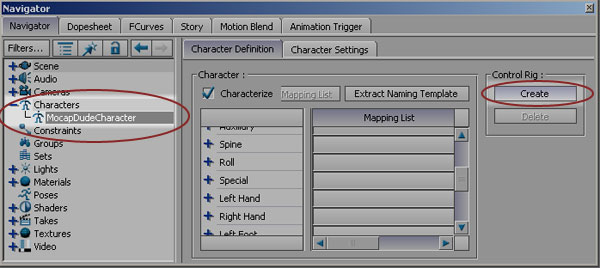
Go to the Asset Browser window, under the Templates folder from the Characters section drag the character icon to any joint of your model and select characterize from the popup option that appears (fig 7).
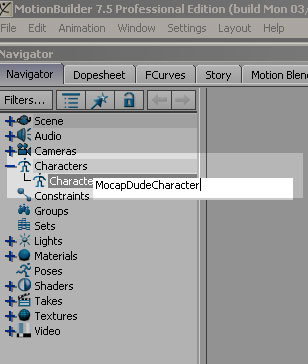
Motion Builder will ask you if you want to characterize the rig as a biped, or a quadruped, since we are using a human model for this tutorial click on the biped button. A Characters section appears under the navigator window, open it up and rename Character to MocapDudeCharacter (Fig 8).
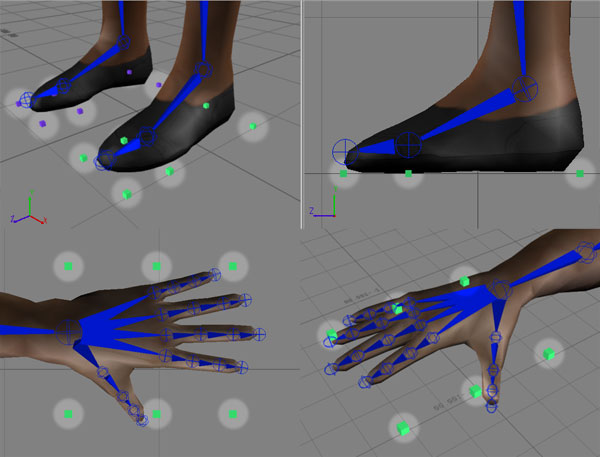
Fit the contact planes of the character by placing the green and purple boxes around the feet and hands to the appropriate places. Heel, Ball and Toe for the feet and Wrist, Finger Base and Finger End for the hands (Fig 9). Contact planes are a great help for foot roll motion and preventing floor sliding as you will be able to see in the Transferring Optical Data to Joints tutorial.
Fig9.
Fig 10.
Fig 11.
|
||||||
 |
||||||