How to Clean a Character Studio Skinned and Weighted Model Tutorial |
||||||
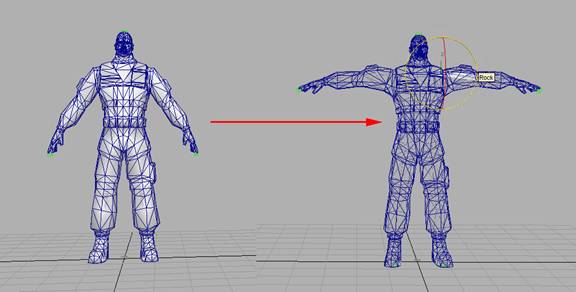
By Jimmy Almeida and Kevin Wang Introduction This tutorial covers the process of exporting a character that was created and rigged in 3D Max using the Character Studio plug-in for use inside of Motion Builder. It also shows how to make adjustments to the skeleton and skin in Motion Builder 1. Open Character Studio MAX and bring in your Game Character. 2. If the character is not already in a proper “T” pose, rotate the upper arm or shoulder joints so this it is. (The names differ from Skeleton to Skeleton. The joint that you want to rotate is the one with the ball and socket of the arm.)
3. Once the Character is in T pose, export it to Motion Builder. (EX: This character is called “Alec.fbx”. You may need to down load the Plug-ins from Autodesk’s AREA website. http://area.autodesk.com/downloads/
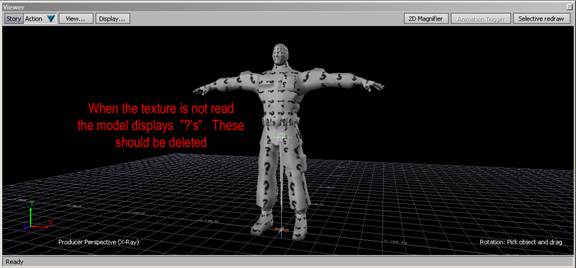
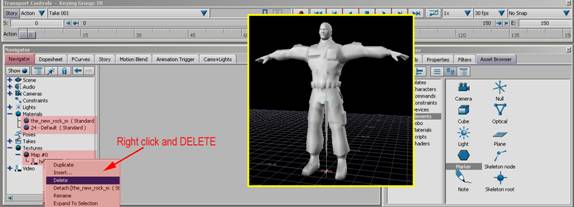
4. Open the character in Motion builder. You may notice that the character has “?’s” all over it. This is because it is not reading the texture. To get rid of these, go into the Navigator Pane and Right Click on the Materials and Textures. Choose delete
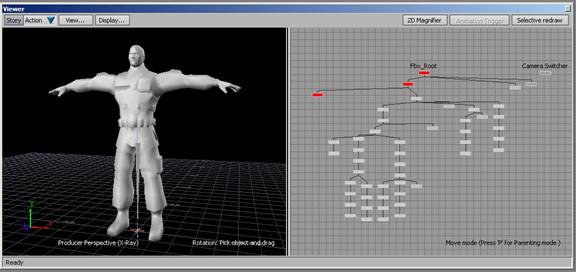
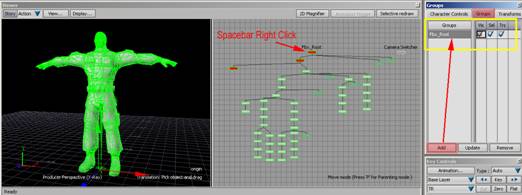
5. Split you screen in 2 by Ctrl+2 in the perspective view. Then click on one of the views and click Ctrl+W to bring up the Schematic View in that window.
6. Spacebar+Right Click (SBRC) the top of the Hierarchy to select everything under the root. Go under the Group Tab and Add this character to the group. Rename the group “Reference” as this will be how you check your animations. The group allows you to Toggle visiblilty, selection capability and translation capability on and off.
7. Sometimes a skeleton will come in either too big or too small. In this case, the skeleton is too small and needs to be scales up. With the Hierarchy still selected, go down to the properties tab and change the Skeleton Node(s) Size to 100. This will make it more visible. While you are at it, you might want to change the color of the joints. This can also be done here by clicking and dragging in the RGB boxes. 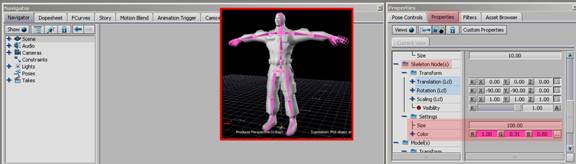
|
||||||
Back |
||||||
 |
||||||