Cleaning Up a Transfer from an Actor to a Character Tutorial |
||||||
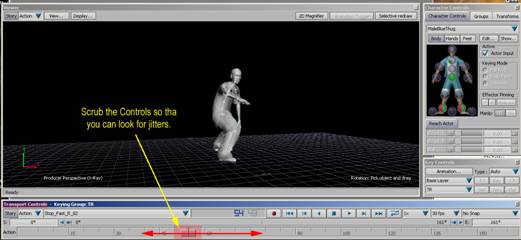
By Jimmy Almeida and Kevin Wang Part 2 10. Turn your Actor invisible so that you can scrub your animation. Here is where you check for anomalies. If there are any, send it back to IQ or tweak it in the Fcurve Editor, which I will show you how to do later. 11. Scrub the animation in the Transport Controls Pane. Look for Anomalies.
12. In the Navigator under the Takes tab, Dbl click on the name of the animation you are working on. Right next to that, there is a column that has a listing of that same animation. Right click on it and pick duplicate. Rename it to Reference. You will use this as a fall back in case you make a mistake. (EX: Let’s say that you have created these “fall back” layers and you have taken the animation to its export stage, but something needs to be changed in the animation of the control rig (Step 12 and 13). If you go into the takes drop down and pick the Reference node, you will be able to adjust your work. If you hadn’t done that, your control rig would have been deleted and you would have been stuck starting over.
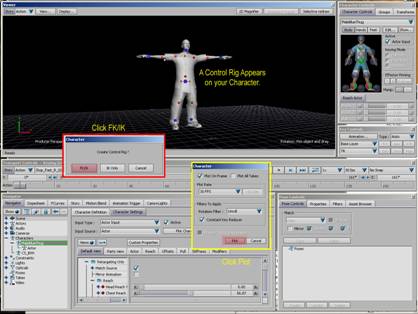
13. Go back to frame 0. In the Navigator under Characters, double click on your character. Then In the Character Settings, click on Plot Character. Choose Control Rig.
14. Then Choose FK/IK. Another box shows up. Leave everything on default and choose Plot. A Control Rig appears on your character. This will be used to fix any animations that are not looking good on your character. In this case, the characters arms are going through the abdomen.
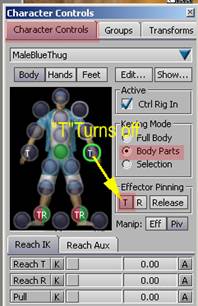
15. Go into the Character Controls Pane. I want to be able to rotate my arms with the control rig freely. Therefore, I set the following: Keying mode to Body parts so that I select and affect just the arm chain. Pick each hand circle and notice the T in the middle of it. This means that the hands translation is pinned. Since I want to rotate the arm from the shoulder, I don’t want the hand pinned and will therefore turn it off by clicking on the T in the Effector Pinning area. Do this for both hands.
16. Set the Reach IK T and R to 100%. We do this because we want the character skeleton to follow the Control rig 100%. Do this for the whole arm. Now the arm will completely follow the rig.
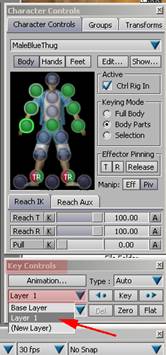
17. Right below the Character controls is the Key Controls. This is where you will do most of your keyframing. However, you will notice that the time line has a key frame on every frame. To tweak this information would be very difficult. Therefore, click on the pull down where it says base layer and pick Layer 1. Notice that the keyframes went away. What actually happened is that you added a layer on top of those keyframes that will allow you to edit the information cleanly. Next to that are several buttons. Key is what you press when you want to make a regular keyframe. Flat will add a key, but it will keep the Fcurve handles flat. Zero will bring your rotation values back to their normal state for that frame.
18. Pick the Cell for on of the arms in the Character Controls. Make sure that you are in Local Space rather than World Space (F2=local, F3=world). Edit the data by scrubbing the animation. Look for the point where it starts to get bad and then set an anchor key (key where you have made no adjustments). 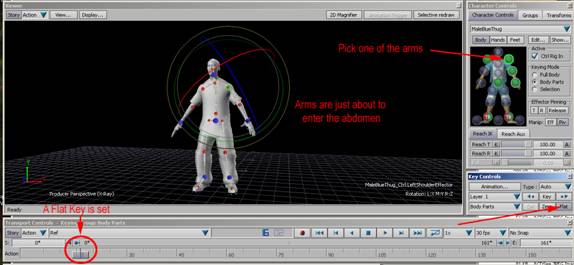
|
||||||
 |
||||||