Fitting a Biovision Skeleton to a Character Studio Skeleton (CS to BVH) in Motion Builder Tutorial |
||||||
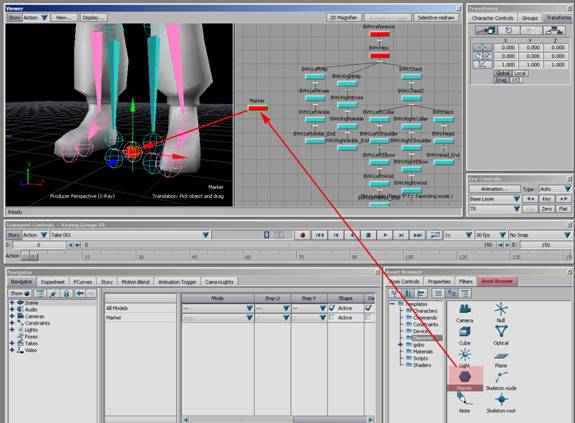
By Jimmy Almeida and Kevin Wang Part 2 9. In the Asset Browser under Elements, grab a Marker and pull it into the Schematic View. It places it at the origin automatically.
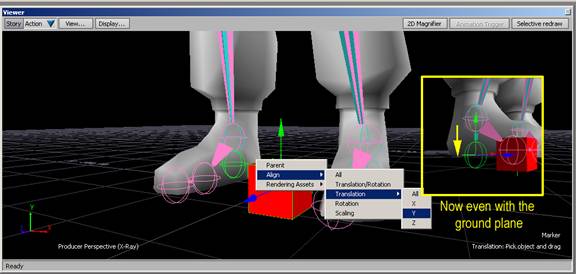
10. The end effecter on the feet depicts where the ground is on the CS_BVH. Therefore, you need to align it with something that is on the ground plane such as the Marker that you just pulled in. Grab the end effecter and Alt+drag it to the Marker. Let go of the mouse and choose Align>Transition>Y. This brings it down only in the Y axis. Once you have done both feet, delete the marker.
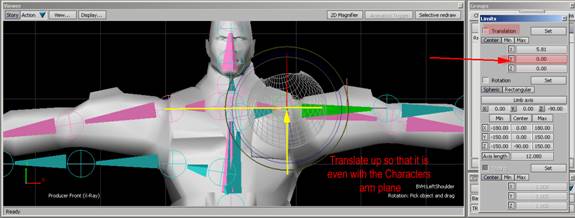
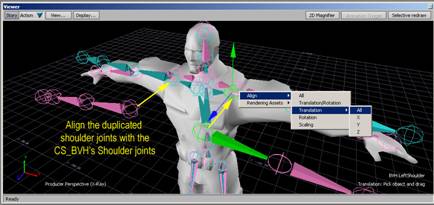
11. Now come the clavicles. Go into the Front View (Ctrl+F). SBC a Clavicle. Go to Edit>Transforms>Limits. A box pops up. Under the Translations part, enter random numbers in the Y section until the Shoulder Joint, NOT THE CLAVICLE, lines up with the characters shoulder joint in Y. Do this for both sides. Close the limits box when you have finished. NOTE: On the CS_BVH, the Clavicles are only able to move in the Y direction. Attempting to unlock them and move them in the X and Z will cause big problems.
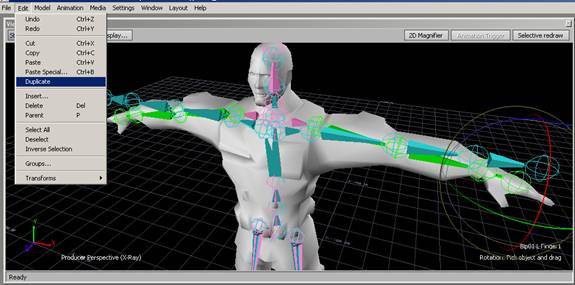
12. Next, SBRC the Character’s Arm Chain on both sides. Go to Edit>Duplicate. Since the Clavicles on the CS_BVH can’t be moved to match the clavicles on the character, we duplicate the characters arms so that we can bring them to the CS_BVH. We need the rotations to be at 0 no matter what, but we can match the angle of the Characters Skeleton by snapping the CS_BVH arms to the duplicated Character arms.
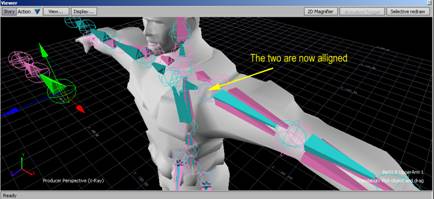
13. Translate the duplicated arms in the Z axis. Then pick one of the arm joints and Align it to the Arm joint of the CS_BVH. Now the duplicated Characters arms are in line with the arms of the CS_BVH.
14. Align the rest of the CS_BVH’s arm joints to the Character’s arm joints.
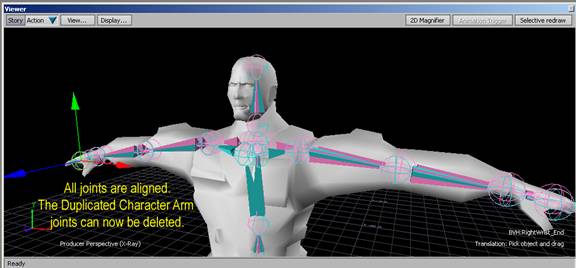
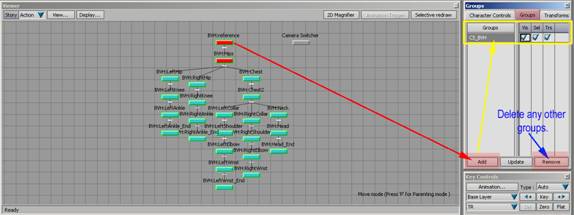
15. The duplicated Character’s Arm joints have now served their purpose and can be deleted. In the Schematic View, find them SBRC on them both and press delete. In addition, the character had served its purpose and can be deleted also. 16. In the Schematic View, SCRC on the root of the Hierarchy to select everything. Go into the Groups Pane and click on Add to put it in a group. Rename that new group “CS_BVH”. Then delete any other groups if there are any.
17. Save out your Scene as “Name”_CS_BVH.fbx
|
||||||
Next |
||||||
 |
||||||