Understanding Constraints Tutorial |
|||||||
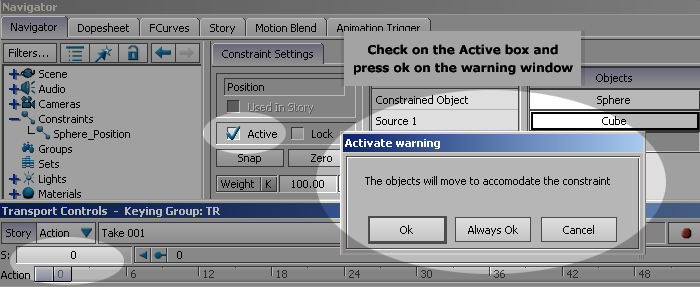
By Ricardo Tobon Page 2 Activating the Constraint The relationship between the objects involved in the constraint will differ according to the distance between the objects at the time of activation as well as the process used to activate the constraint.
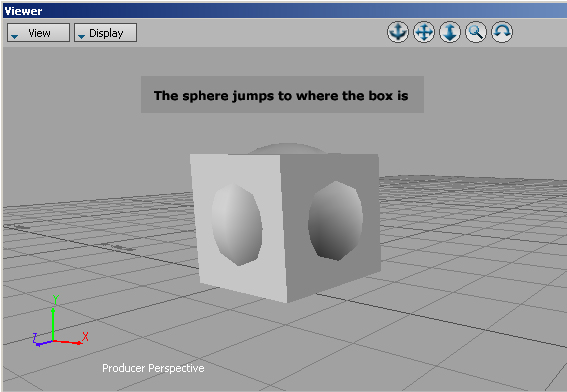
When you play the animation both the sphere and the cube move together one on top of the other, the sphere translates with the cube but does not rotate (mov 01).
|
|||||||
Mov 01.
|
|||||||
Go back to the beginning of the animation. Uncheck the Active box under the Constraint Settings. Notice how the sphere goes back to its original position.
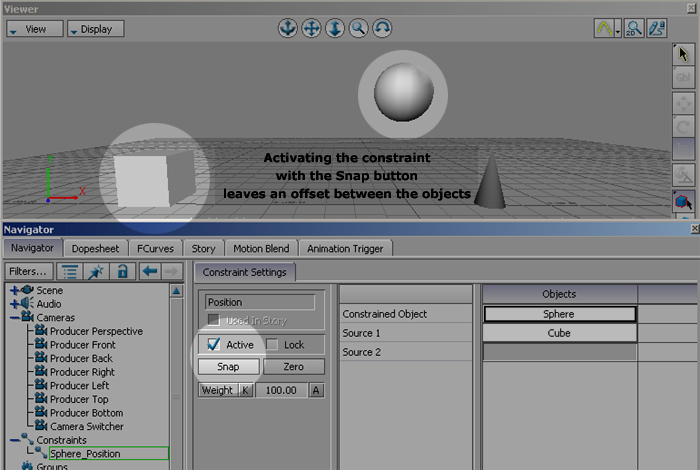
When you play the animation the cube and the sphere move together while keeping their initial offset. Like the previous case the sphere translates with the cube but does not rotate (mov 2).
|
|||||||
Mov 02.
|
|||||||
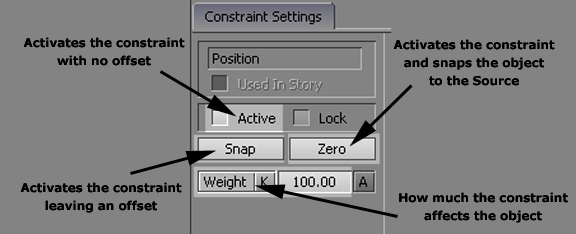
Figure 8 gives a brief explanation of what the Active checkbox, theSnap and the Zero button do (fig 8).
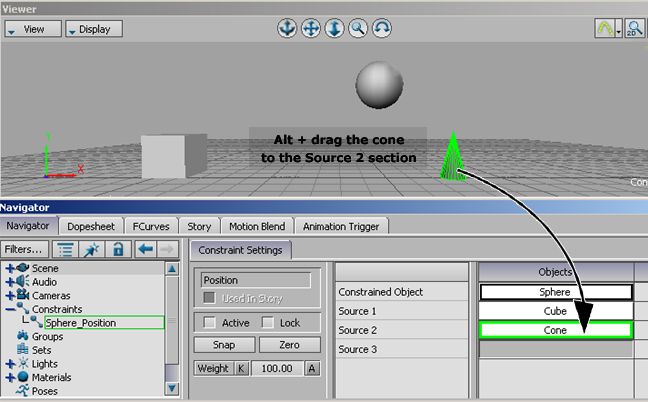
Adding a Second Source Go to the beginning of the animation and uncheck the Active box under the Constraint Settings.
Click on the snap button to activate the constraint while leaving the original offset. When you play the animation the sphere moves half with the sphere and half with the cone (mov 3).
|
|||||||
Mov 03. |
|||||||
 |
|||||||