Page 3
Characterizing
with custom naming conventions
When you want to keep your custom naming conventions while doing the
characterization process, you still want to make sure that your skeleton
is facing the positive Z axis on full TPose.
Instead of renaming the bones go directly to the Asset Browser window
and under the Templates folder from the Characters section drag the
character icon to any joint of your model and select characterize from
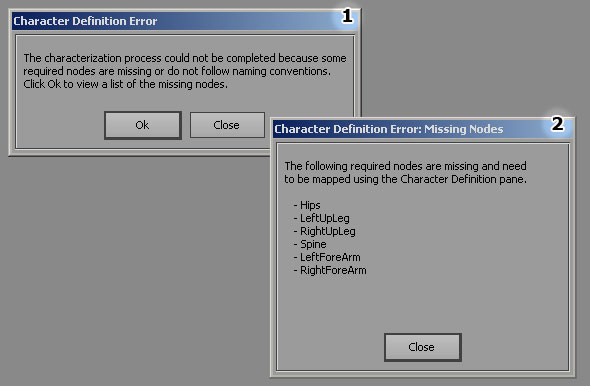
the popup option that appears. A prompt window will warn you that the
characterization process could not be completed; it will also give
you a list of the nodes that it cannot find. (fig 12).
Fig
12.
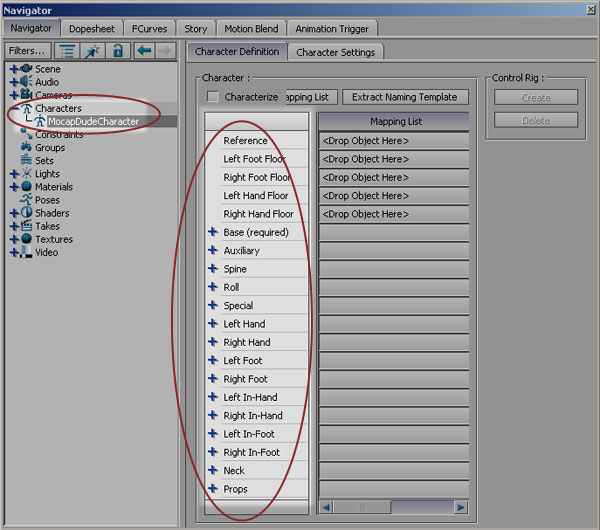
If you look under the navigator window, you will see that a new character
does appear under the character section.
Open the character section and rename Character to MocapDudeCharacter.
Double click on to load its properties on the navigator window. Under
the character definition tab you will find the following options: Reference,
Left and Right Foot Floors, Left and Right Hand Floors, Base (Required),
Auxiliary, Spine, Roll, Special, Left and Right Hands, Left and Right
Feet, Left and Right In-Hand, Left and Right In-Feet, Neck and finally
props (fig 13).
Fig
13.
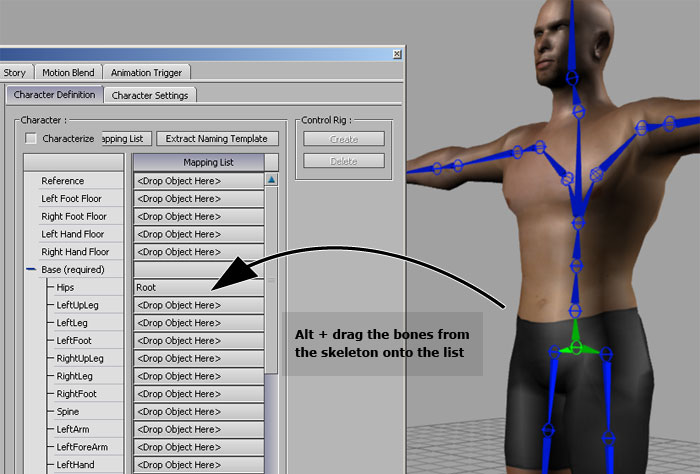
Alt + drag the bones of your skeleton to the boxes under the mapping
list besides the list of options that was previously mentioned (fig 14).
Fig
14.
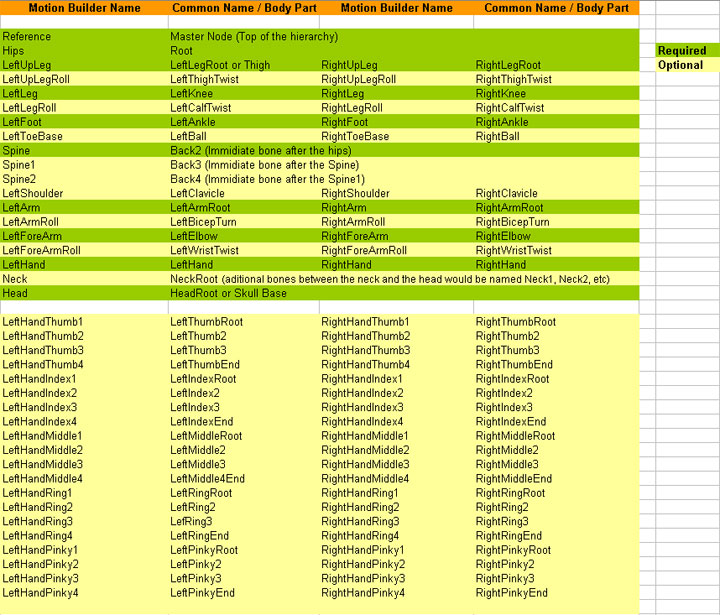
Here is a table of the nodes that Motion Builder expects against the
naming people commonly use (fig15).
Fig
15.
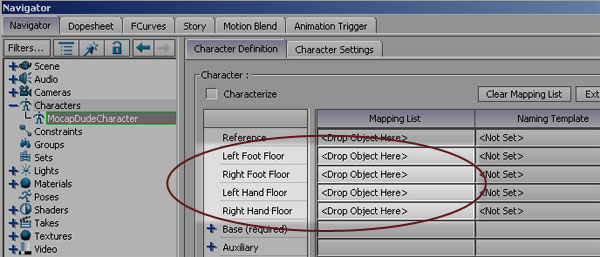
The Feet and Hand Floors are meant for geometry that you don’t
want the feet or hands of your character to go through. They work in
conjunction with the floor contacts of your character settings, most
times is establishing the ground floor for your animation. If no model
is specified for your contact floors the grid gets assigned by default
(fig16).
Fig
16.
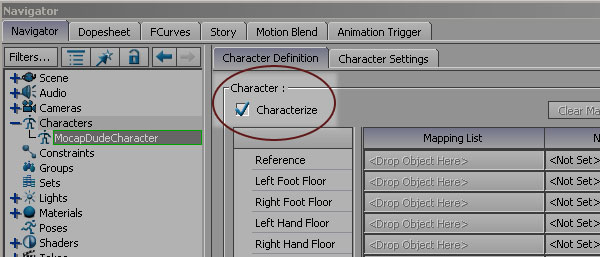
After you drag the pertinent bones from your skeleton to the different
slots of the mapping List, click the Characterize checkbox inside the
Character Definition tab (fig17).
Fig
17.
You will be asked if you want to characterize the skeleton as a Biped
or a Quadruped. Select Biped. Your rig has been Characterized! Fit
the contact planes and Create a Control Rig trough the steps covered
in the Characterizing
with native naming conventions section so you can pose your
character and layer animation on top of motion capture data.
Conclusion
This tutorial has taken you through the process of Characterizing a
skeleton Automatically (MB native naming conventions) and manually
(Custom naming conventions) so you can transfer animation amongs
different sketons, animate using a Control Rig and transfer motion
capture data to your moldels via the actor tool.
To learn more about layer animation do the Understanding
Layer Animation tutorial.
To learn more about the actor tool do the Transferring
Optical Data to Joints tutorial.
|
